


Out of sight, out of mind? Not so fast.
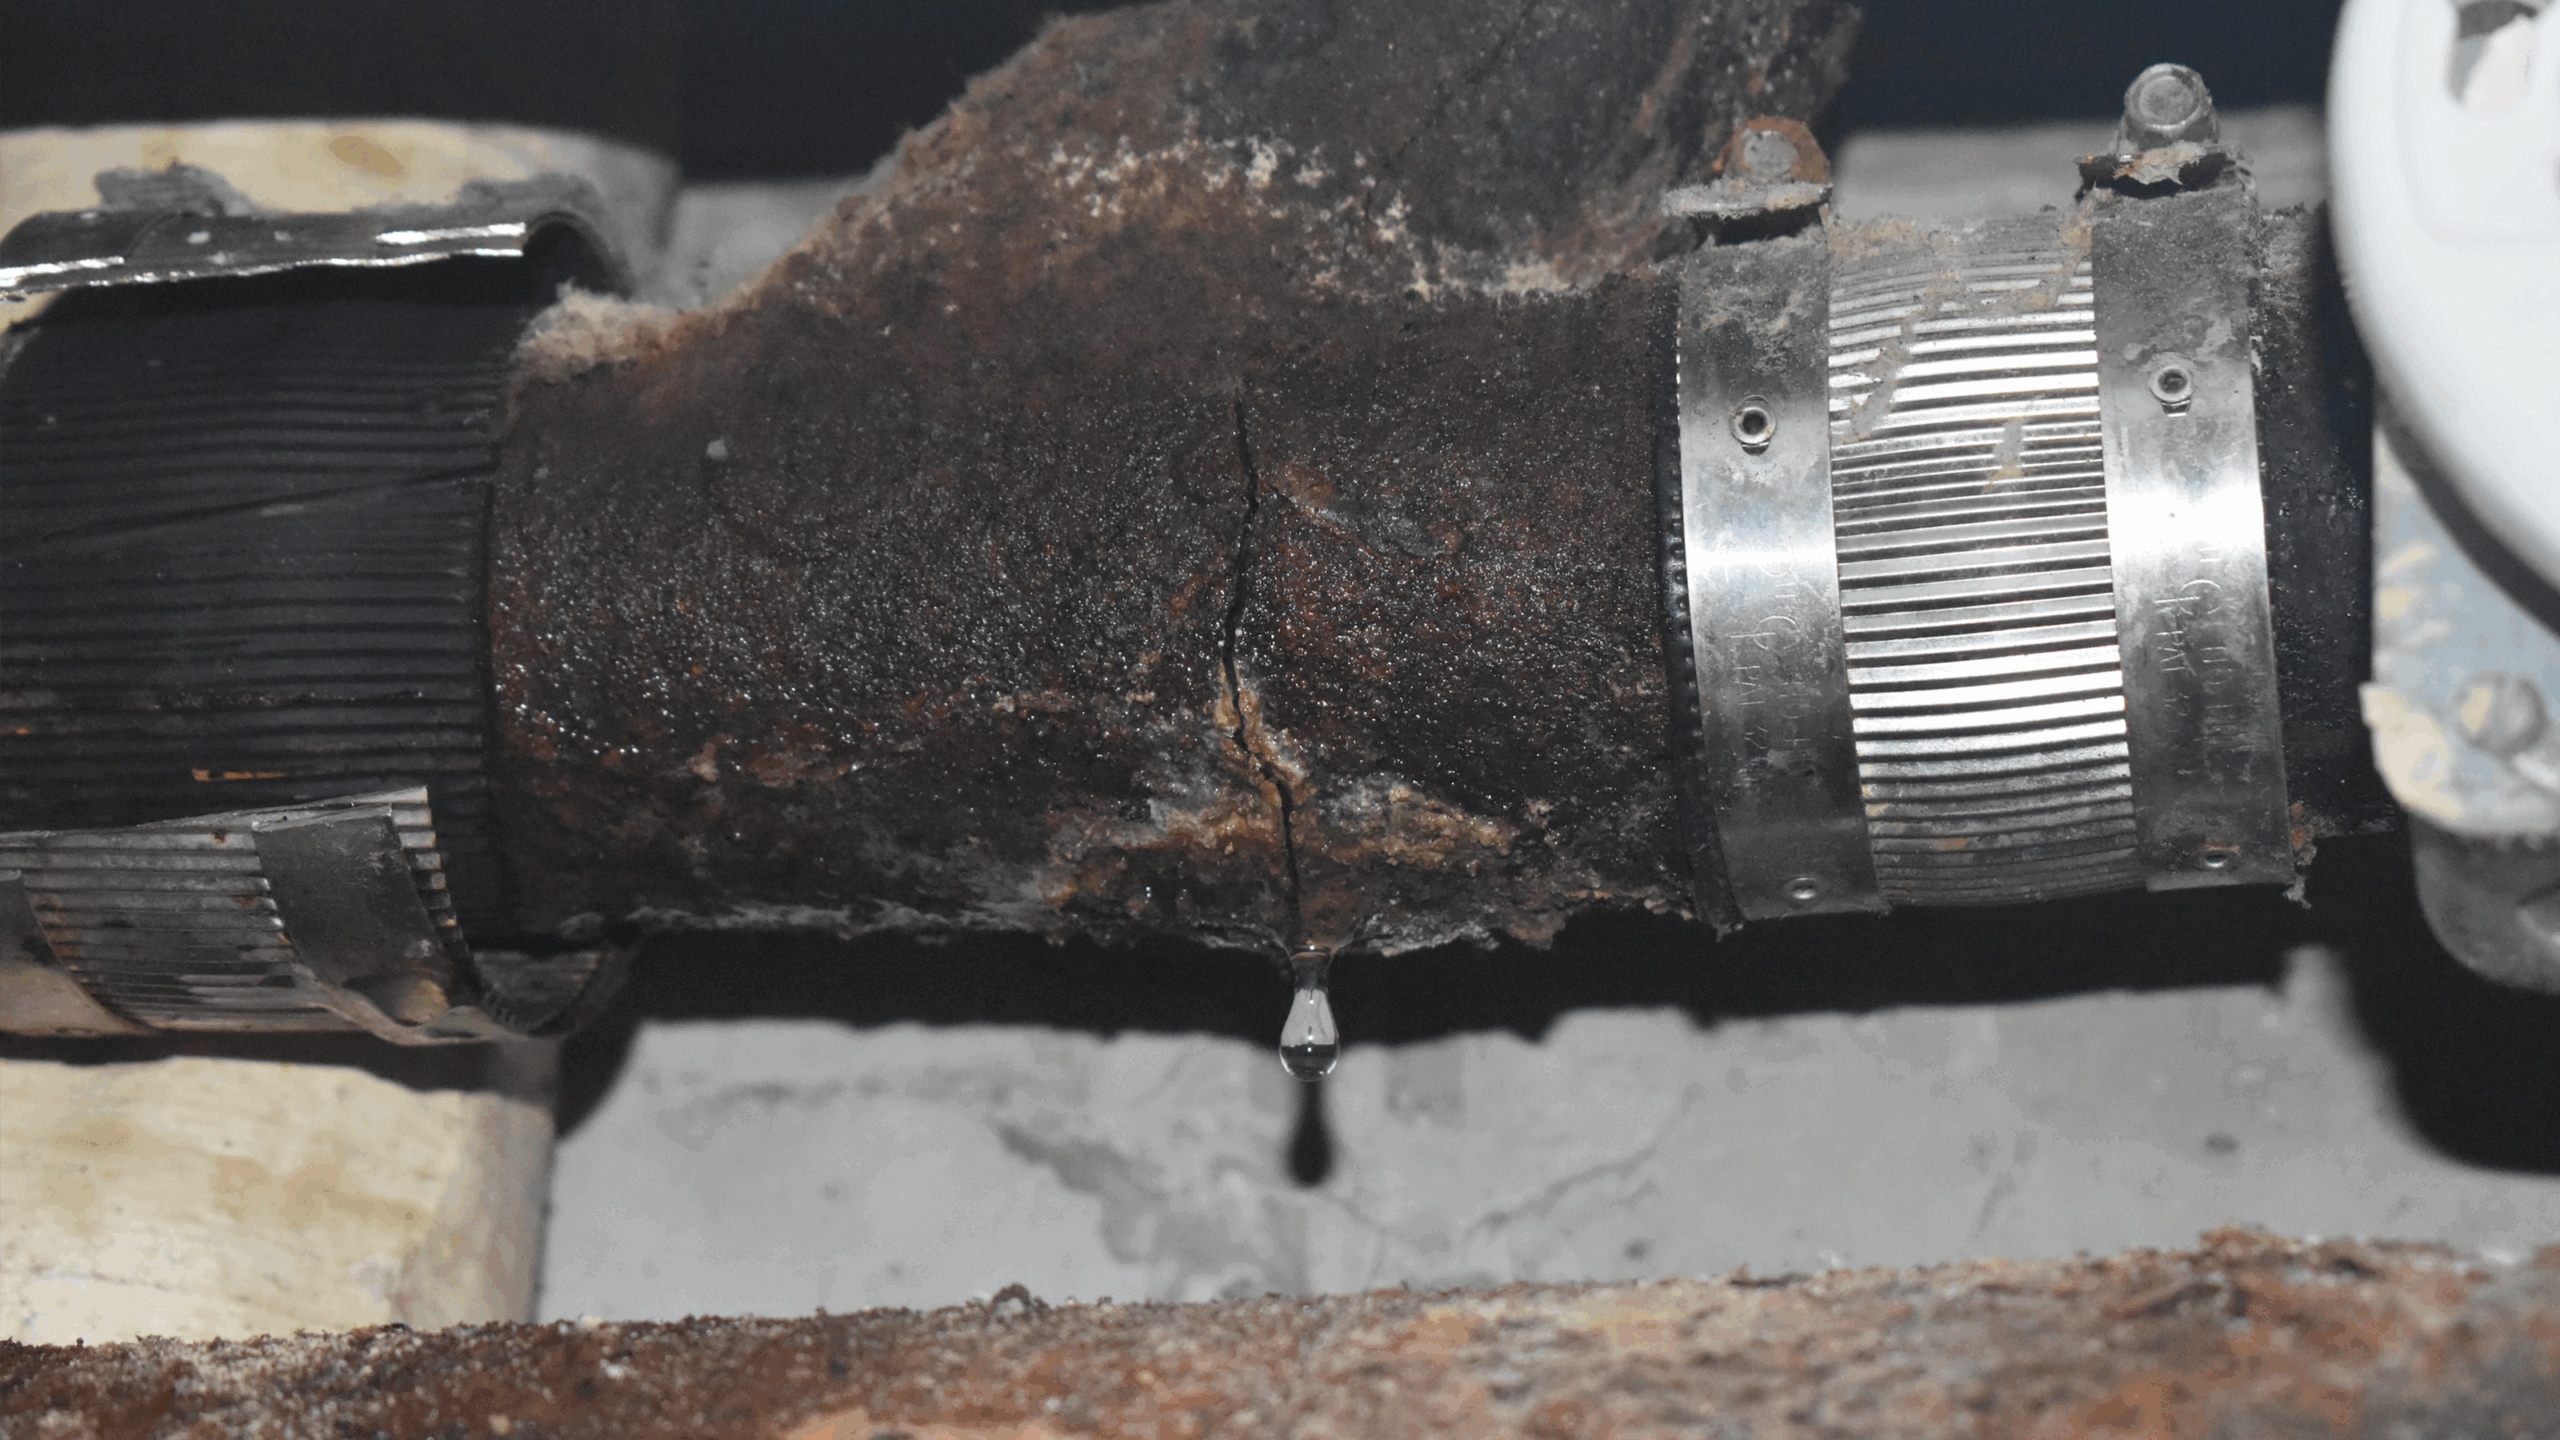
It’s easy to forget about what’s behind the walls of your building. But when there’s a problem with your piping system, out of sight becomes top of mind very fast. Pipe failures can quickly get out of control, with leaks leading to damage to walls and ceilings, costing big money to fix. Even small pinhole leaks that remain undetectable for a time can lead to long-term moisture and mold issues, potentially endangering the health of residents.
When it comes to plumbing, proactive investment and simple maintenance strategies can help you avoid costly disasters and liability.
Understanding Your Piping Systems
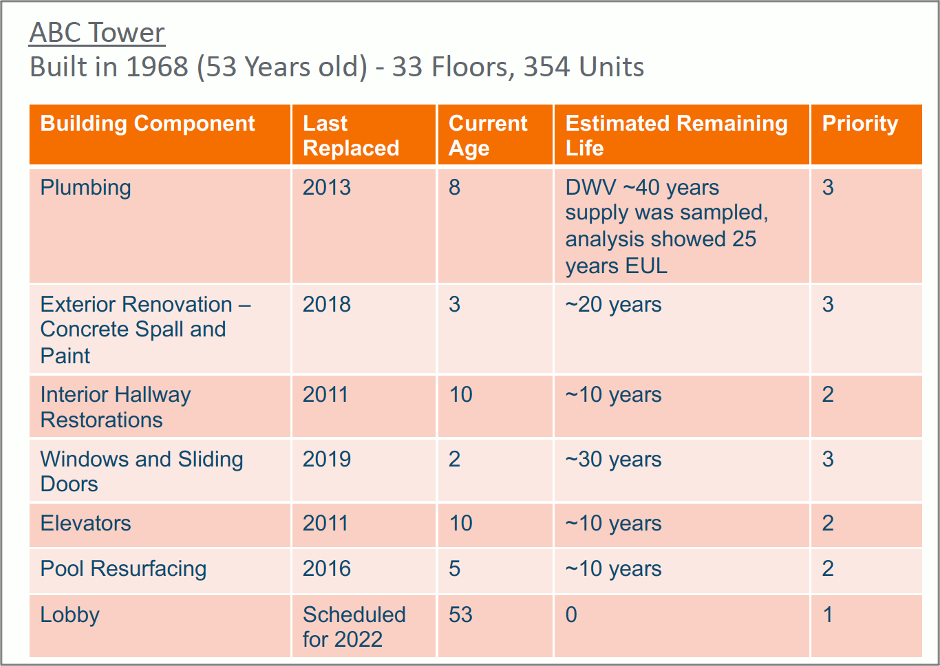
As buildings age, the pace of failure of major building components accelerates. By knowing when your property was built, the estimated usable life of the buildings’ major components, and what systems have already been replaced, you can quickly determine what will likely be your next set of priority projects.
According to Fannie Mae and HUD, domestic piping systems have an estimated useful life of 30 to 50 years, and drain, waste, & vent piping has an estimated useful life of 50 years. However, these timeframes may shorten due to water quality; we’ve seen some copper piping systems start to fail after just 10 years due to highly corrosive water. Also consider that several pipe materials—orangeburg, clay, and lead—have aged out completely and should be replaced to avoid catastrophic and high-profile failures.
The example below shows how a sample building might prioritize maintenance and replacement needs based on various factors.
When Is It Time to Replace Your Piping System?
Each system in your community will have a trigger point that lets you know when it’s time to be replaced. In short, when annual costs to repair the system are greater than the annual costs to replace the system (by financing/refinancing and paying off the loan), it’s time for a replacement.
Other signs indicating you may need to replace your pipes sooner rather than later:
• Are your insurance rates going up due to an increase in claims?
• Are you tired of paying for losses, damages, or floods?
• Are you tired of shutdowns required to perform repairs?
• Do you constantly talk about these issues at board and other resident meetings?
• Are residents and owners getting frustrated?
• Have you seen an increase in public comments about your community’s problems (social media, etc.)?
If any of these sound familiar, it’s time to start thinking seriously about system replacement as an option. Depending on what you’re replacing, there are experts who can do testing and/or inspections to provide an estimated useful life.
How—and Why—You Should Document Piping Failures
In the event of a pipe leak, here are the steps you should take:
1. Know where shut-off valves are for supply so you can stop a leak and stop the damage.
2. Know if your building has hazardous materials (e.g., asbestos) that need to be contained during the clean-up process.
3. Clean up the immediate mess.
4. Determine what caused the leak.
5. If necessary, find and fix the broken pipe. (i.e., an overflowing toilet may not require a pipe repair)
6. Assess damages, undertake repairs, file insurance claims, put the building back together.
7. Fill out the Leak Log to track everything.
A “Leak Log” is an easy way for building managers or owners to keep track of pipe failures, and it’s an important part of properly managing your building. A Leak Log will help you determine which leaks are a one-off occurrence and which are systemic; can help you keep track of which systems are leaking, when, and how often; and can provide documentation to assist with budgeting for repair and/or replacement throughout the life of your building.
Here’s an example of a Leak Log: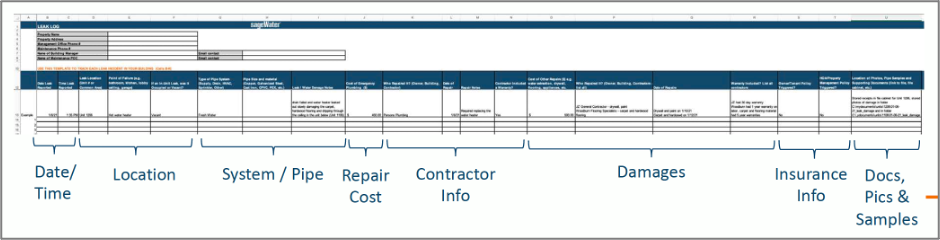
In addition to the steps above, during a pipe replacement, you also should have your plumber or maintenance staff keep the extracted pieces that failed. Tag and bag them and tie them to the Leak Log (when they leaked, where they came from, etc.) to help you track your leaks and possibly expose a repetitive problem or a construction defect. If the same fitting breaks at the same spot in every unit in a stack, it’s usually not coincidence.
Saving the pieces also allows you to send them out for testing in the future. A metallurgist or plastics engineer can inspect sections of pipe to help determine why they failed, and can give you an accurate estimate on the remaining usable life of your system based on actual wear.
Also be sure to take pictures of the pipes and the entire wall cavity while the wall is open. The images can be tied to the Leak Log and can serve as a reference for future issues and will aid in developing a scope of work and obtaining estimates for replacement when the time comes.
Learn more about identifying common pipe issues here.
Protect Your Investment
Thinking about pipes isn’t most building owners’ idea of a good time. But simple strategies such as these—and keeping careful track of leaks and repairs—can ultimately help you manage your maintenance more efficiently, better protect your residents, and maximize your investment.
Ready to get started? Contact us to learn more.